G1NTOKI


  • 首页

  • 标签

  • 归档

NEUTV 第二周开发日记

发表于 2018-05-12

NEUTV项目

方悦成

主要工作

添加下载功能,完善弹幕

提交日志

2018/5/4

  • 修改视频下载部分的代码结构,新建了downloadManager类进行下载处理

李书缘

主要工作

完成弹幕功能

提交日志

p.s.提交中的下载功能是小方完成的,收藏功能是邓翼完成的。

2018/05/05

  • 完善下载进度显示,添加了收藏功能
  • 修改弹幕添加位置,下载功能
  • 完成连接服务器,完成直播功能
  • 根据播放位置实时添加弹幕
  • 监听当前播放位置来添加弹幕
  • 添加弹幕开关,直播,下载按钮

2018/05/04

  • 尝试连接服务器 格式错误
  • 添加弹幕的播放和暂停

2018/05/03

  • 添加弹幕及全屏功能

张代锟

主要工作

主要工作是服务器端的开发

  • 运用python和web.py框架搭建的简易服务器端
  • 修正了一些返回模板文件的格式错误
  • 将xml文件转化为C#对象
  • 修正弹幕类型错误
  • 部署服务器端代码于Ubuntu16.04的主机中,并修改一些bug

提交日志

2018/05/03

  • 将服务端代码部署在Ubuntu主机上

2018/05/04

  • add xml translator without testing: 增加一个转换函数,将服务端发送过来的xml文件转化为Danmaku对象的列表, 但是没有通过测试
  • fix the format problem: 修正xml格式错误
  • merge the media branch: 合并弹幕媒体播放器分支

2018/05/05

  • fix the bug that lead to the type err for danmakulist generation: 修正了使得弹幕列表生成格式错误的bug
  • merge the remote repo: 更新自己的分支

邓翼

主要工作

收藏功能

提交日志

p.s.当时由于网络原因,通过李书缘的github账号提交了收藏功能。
p.p.s 再次由于网络原因,小方用邓翼账号提交了他的更改。

2018/05/05

  • 桌面图标居中&修复弹幕服务器不存在时不可回看的bug
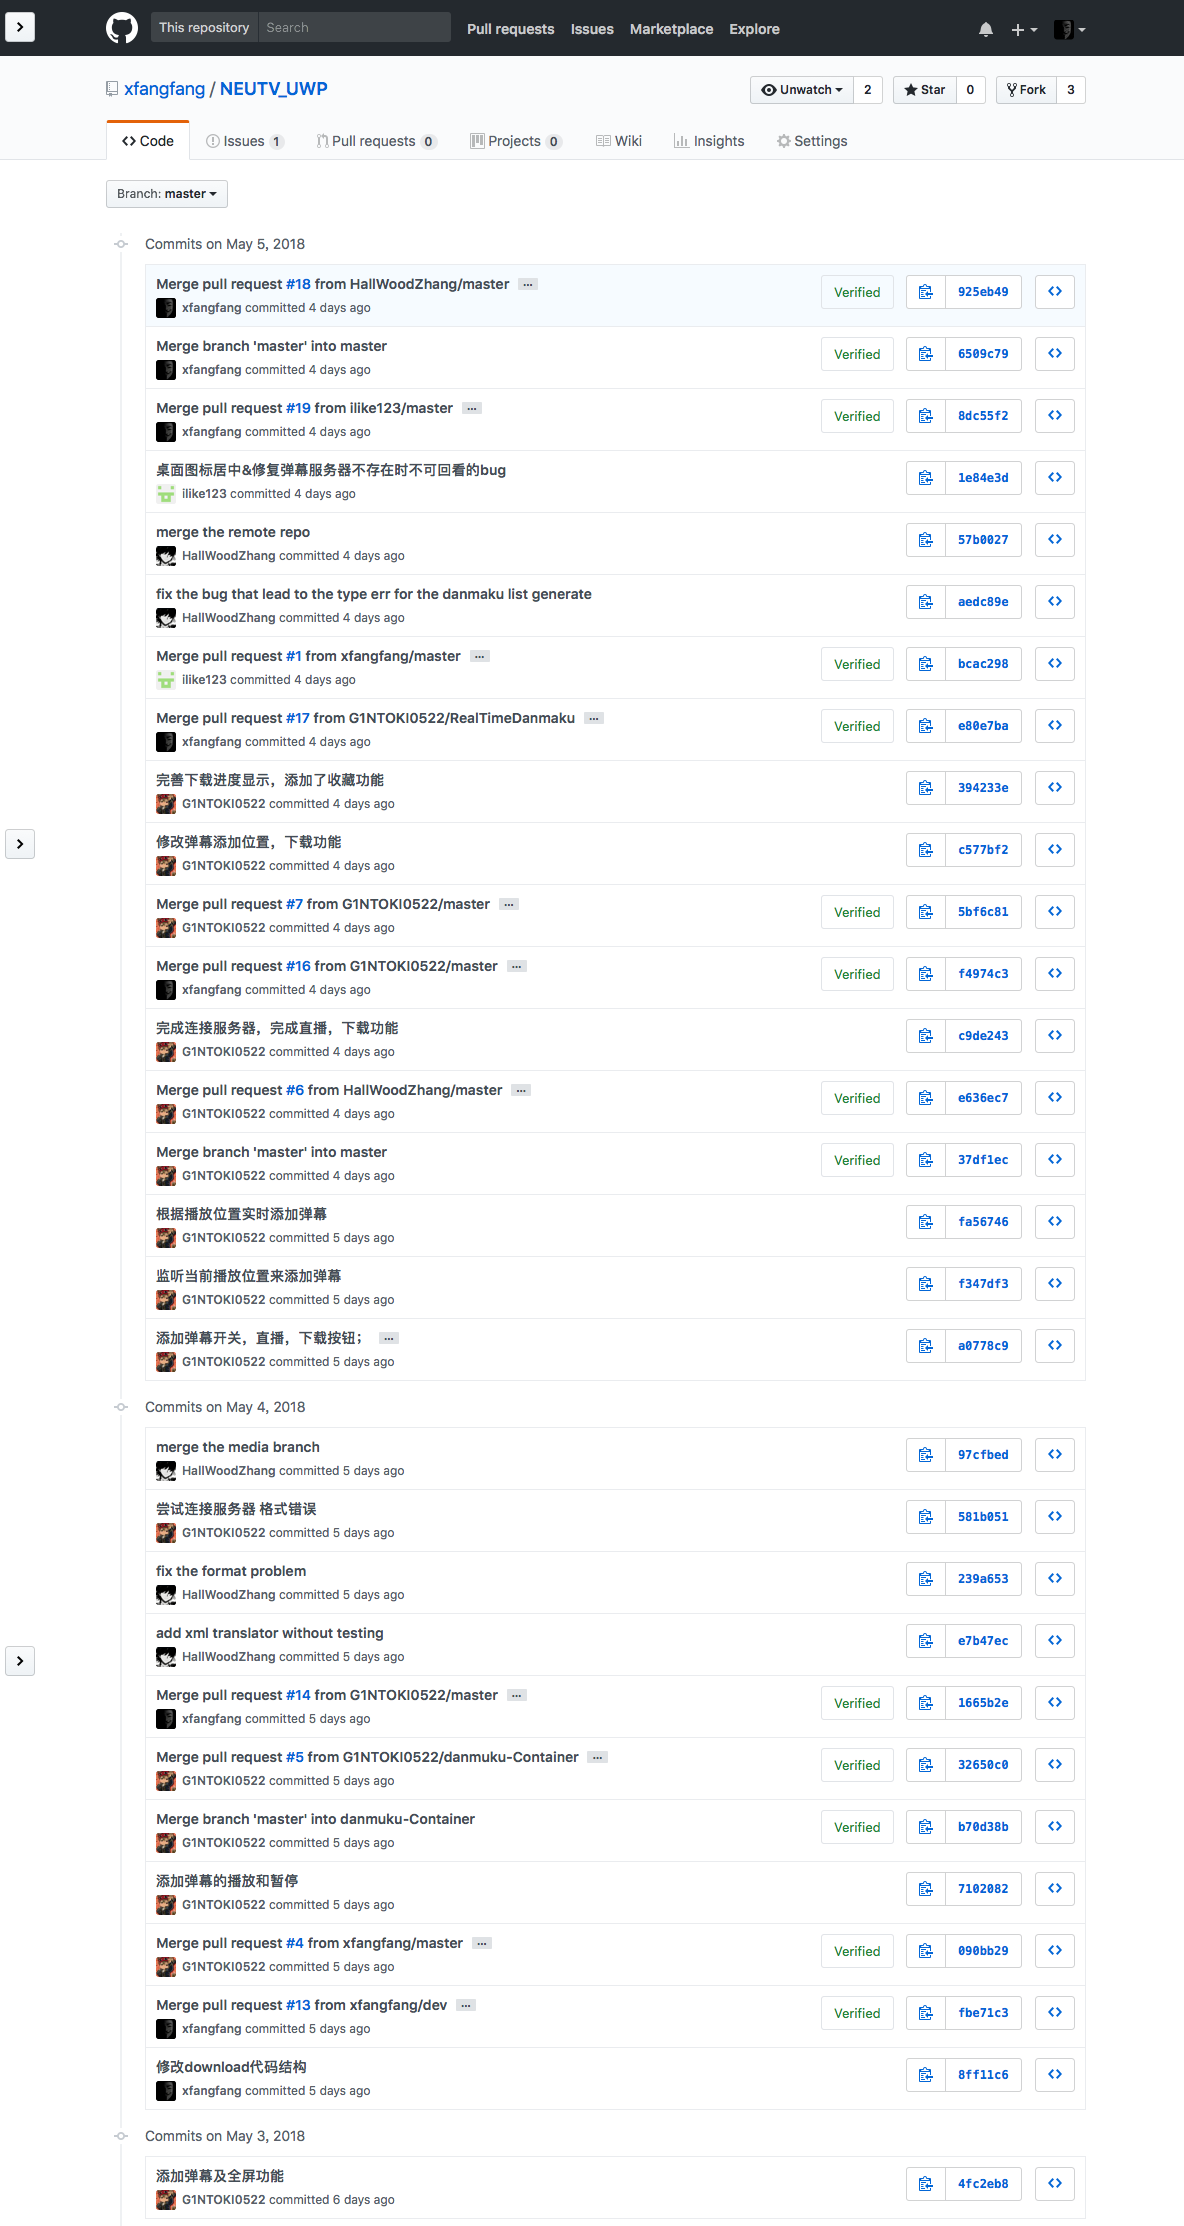
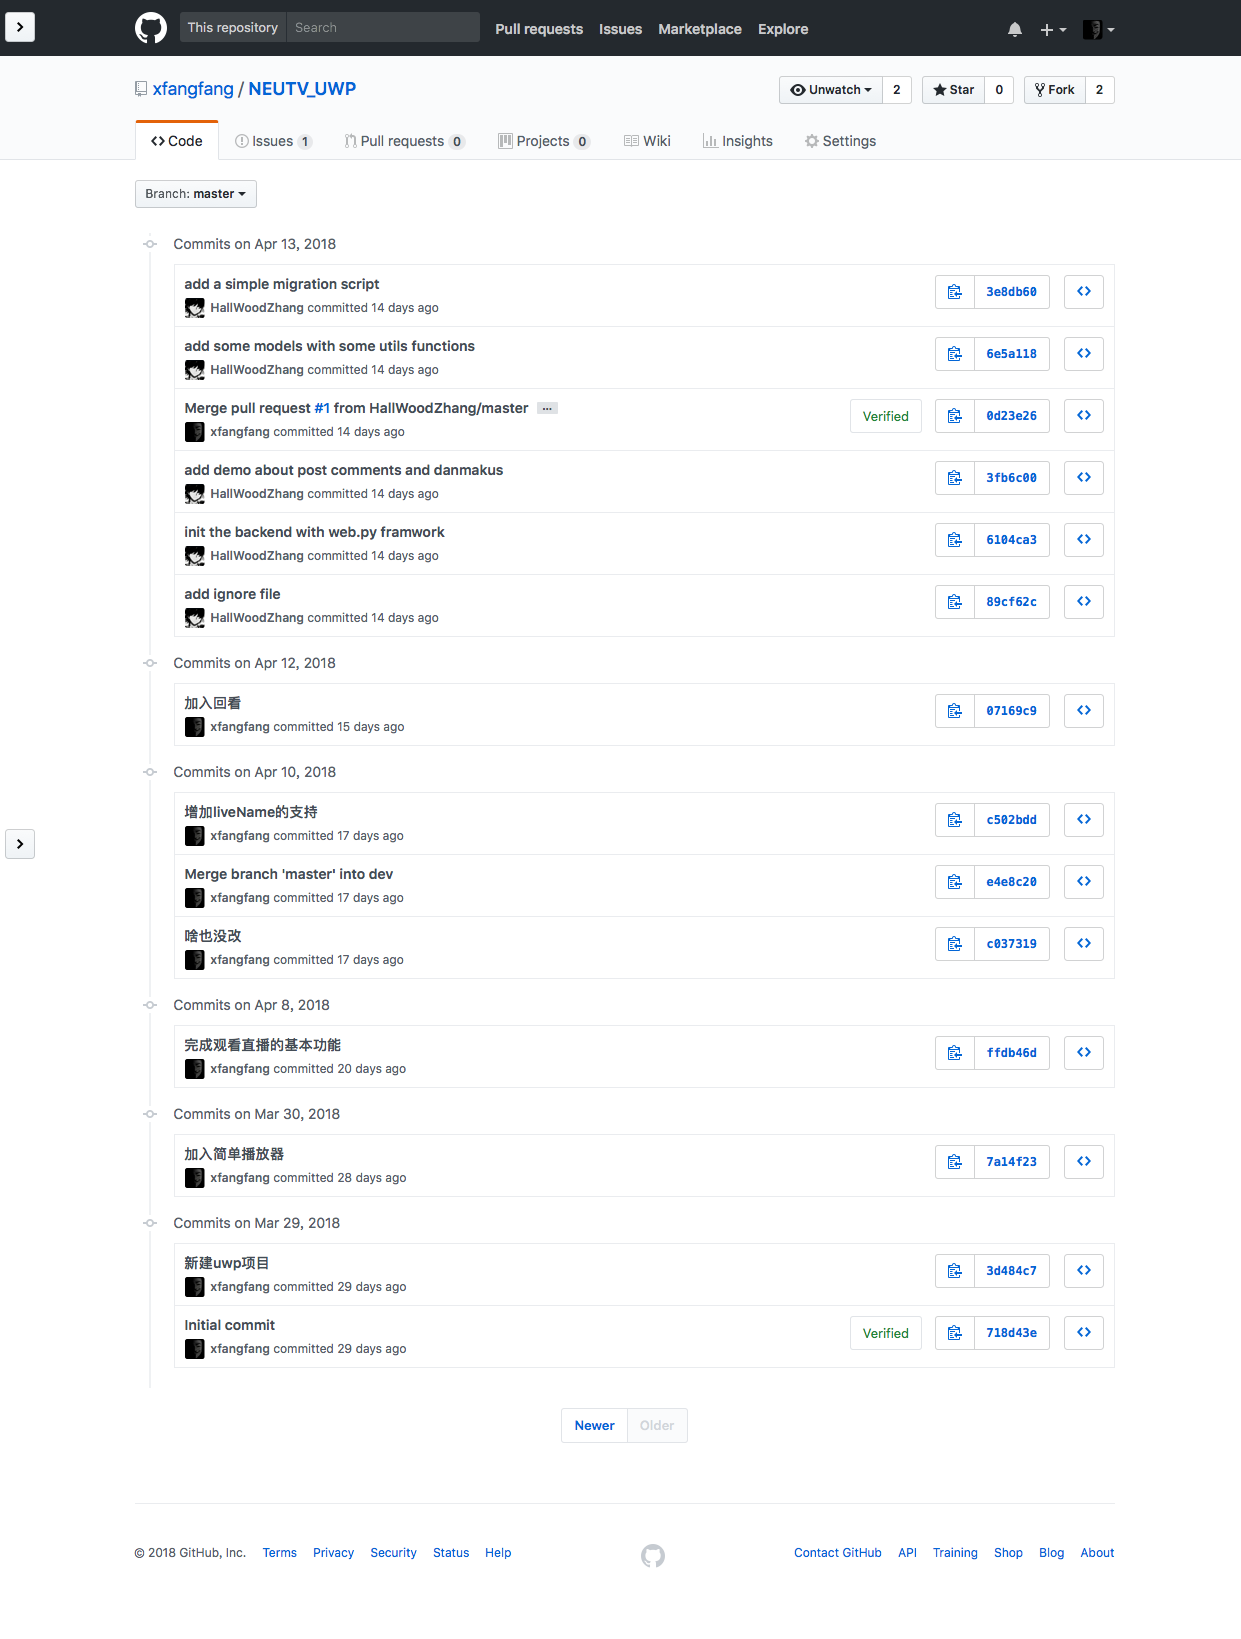
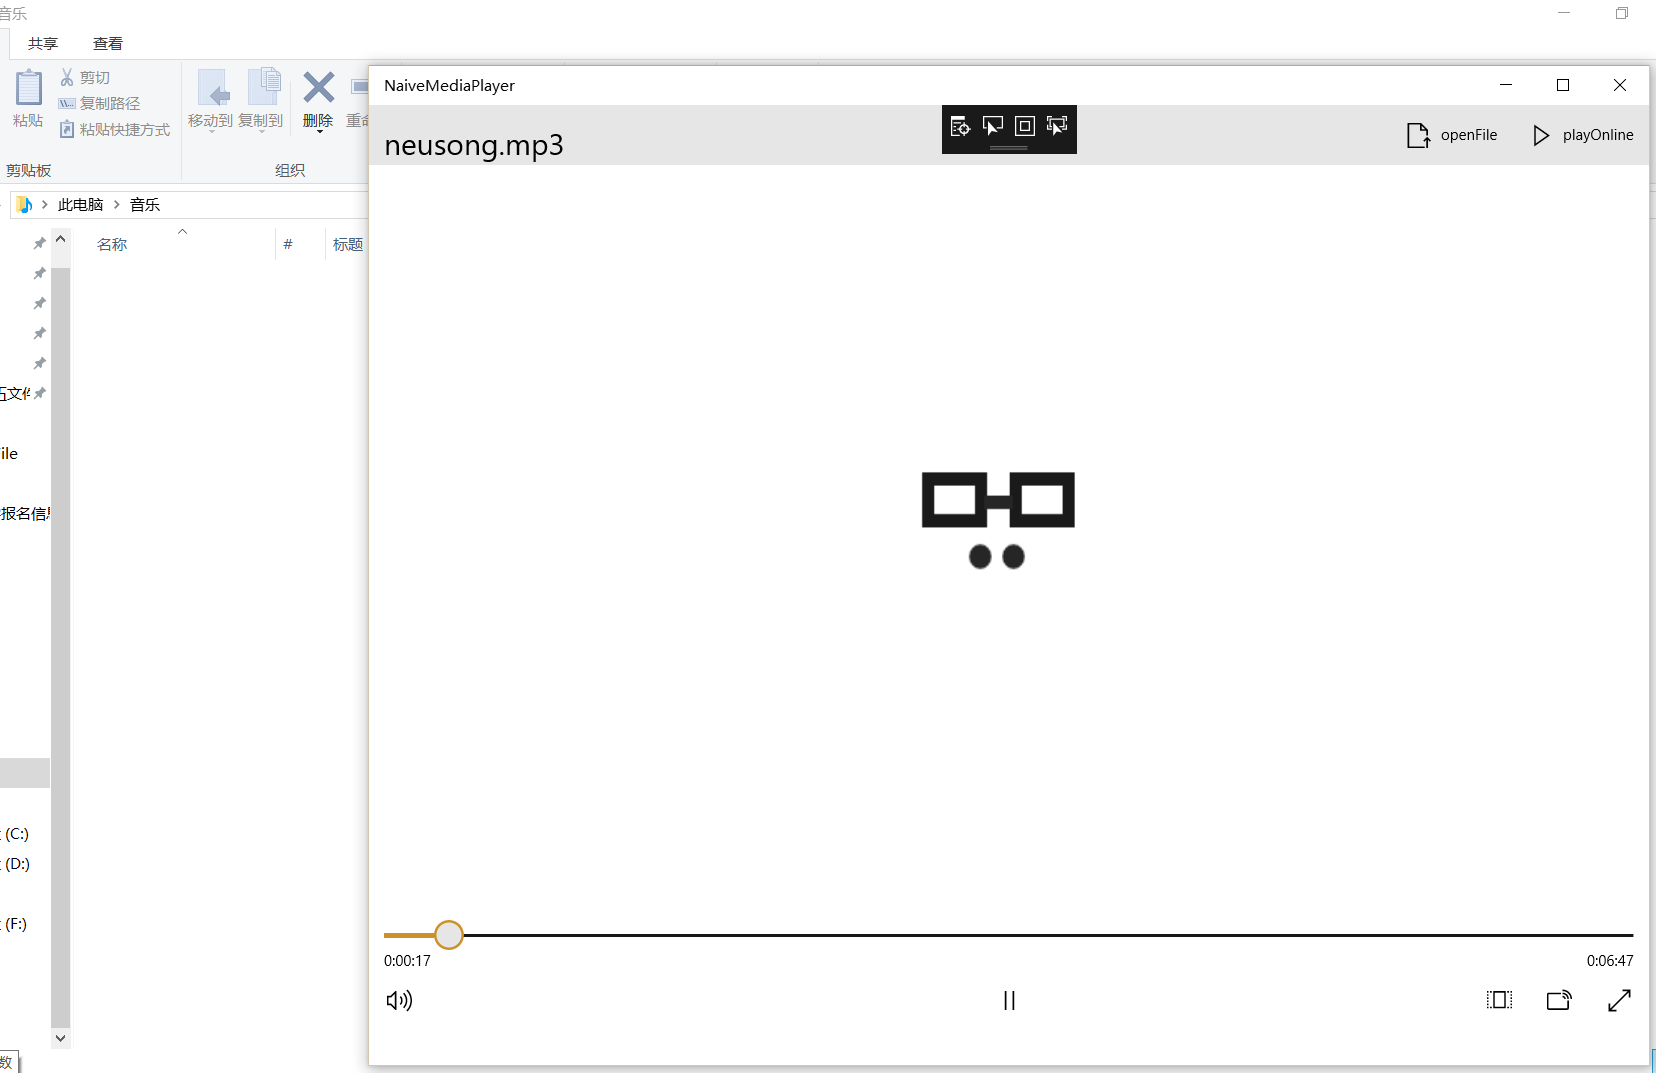
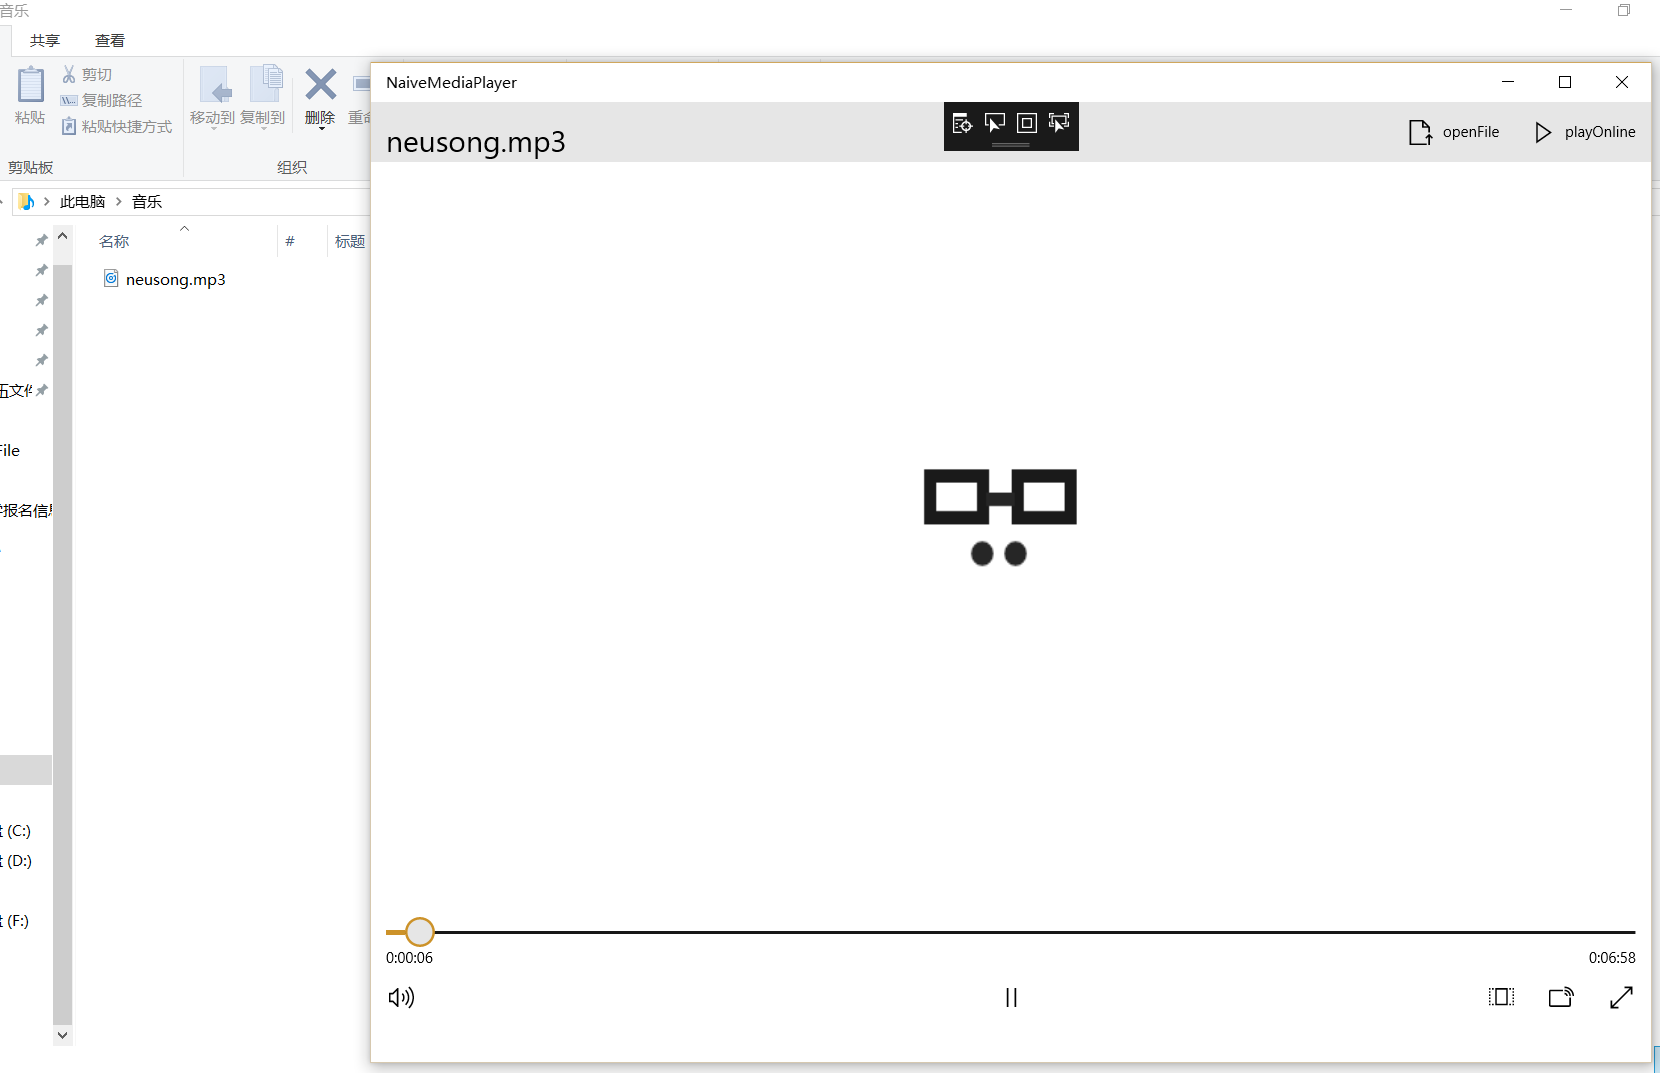
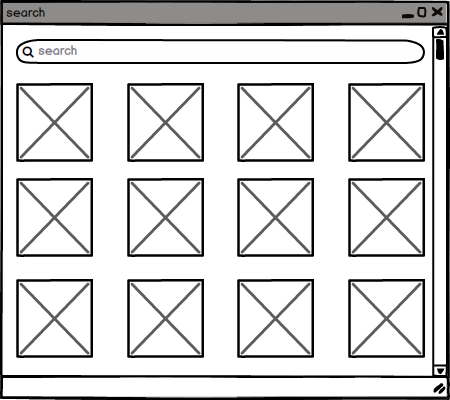
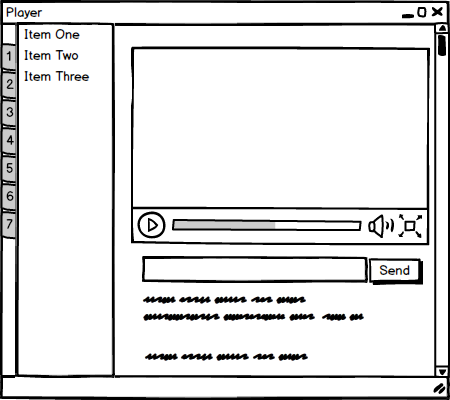
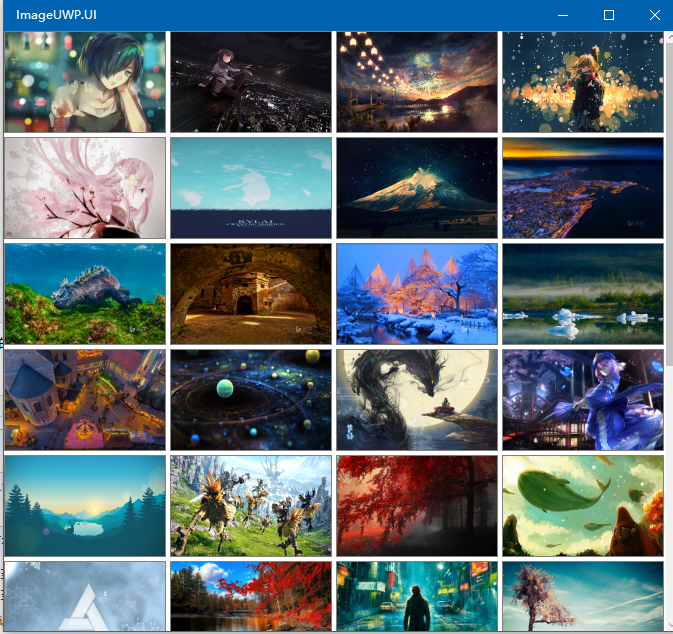
提交截图

ScreenShot

NEUTV 第一周开发日记

发表于 2018-04-27

NEUTV项目

方悦成

主要工作

搭建应用的基础框架和主要功能

提交日志

2018/03/30

  • 加入简单的播放器

2018/04/08

  • 完成观看直播的基本功能

2018/04/12

  • 加入回看节目功能

2018/04/17

  • 修复回看节目时,回看列表第二次进入不显示的问题

2018/04/24

  • 增加下载m3u8文件的功能

2018/04/26

  • 完成单线程下载视频,并合成为单个视频文件

2018/04/27

  • 支持并行下载
  • 下载时 自动选择线程数量

李书缘

主要工作

负责首页电视墙预览,弹幕前端

提交日志

2018/04/19

  • 增加首页图片预览效果
  • 修复 通过首页预览墙进入播放界面无法播放的问题

张代锟

主要工作

主要工作服务器端的开发

  • 运用python和web.py框架搭建的简易服务器端
  • 数据库使用sqlite3
  • 主要用来储存客户端发过来的弹幕和评论
  • 可以根据客户端的请求通过web.py模板生成弹幕文件(xml)和评论文件(xml)

提交日志

2018/04/13

  • add ignore file: 增加ignore文件来忽视编译过后的文件
  • init the backend server with web.py framwork: 初步建立服务端,使用web.py框架
  • add some models with some utils function: 增加一些数据库操作的工具函数,并且增加模板类。模仿django的项目结构
  • add a simple migration script: 增加一个python脚本用以建立数据库,方便客户端开发人员测试
  • add a database file: 建立数据库并且进行初步测试

2018/04/14

  • add a simple connection pool and some database utils: 考虑到有可能有多个客户端接入,为了防止服务器端频繁的链接数据库,增加一个简易的连接池,增加访问效率(虽然很可能作用不是特别明显)
  • fix some bug and ignore the thread diff when init a connection to sqlite: 修正了一些多线程链接数据库的bug,稍微优化了一下连接池函数
  • add query function and interface to generate xml, but file-generation functions were still not finished: 增加一个搜索函数,根据前端发来的请求来生成xml文件,使用web.py的模板系统生成xml,但是有一些bug赏未解决
  • add some template with bugs: 增加一些模板文件用来生成xml,但是生成的时候遇上了一些bug
  • fix some bugs and spelling errors, enable frontend to post beging datetime and enddatetime to get the xml that is generated by the query functions linking to database: 修改正了一些bug和拼写错误,允许客户端发送初始日期和结束日期来获取弹幕文件和评论文件
  • extends search key named ‘channel_id’… : 增加搜索的关键字,允许客户端通过开始与结束时间,还有频道来获取弹幕和评论文件

2018/04/15

  • add markdown doc …: 增加一个markdown 文档来帮助客户端开发人员部署并且进行本地测试
  • update readme.md: 更新readme文档

2018/04/16

  • change the format of templates: 修改生成xml的文档的格式
  • merge the main branch: 合并主分支

2018/04/17

  • alter table danmaku and add a field named ‘type’: 增加一个字段用来描述弹幕类型,修改生成的弹幕文件xml的模板格式,并且修改了生成数据库的脚本migrate.py用来帮助客户端开发人员测试。
  • merge the main branch: 合并主分支

2018/04/18 - Now

  • 服务端开发进入休眠阶段(摸了摸了

提交截图

ScreenShot
ScreenShot

NaiveMediaPlayer2.0

发表于 2018-04-12

介绍

在之前的基础上添加两个功能,一个是从URL源直接播放文件,另一个是先缓存在系统音乐文件夹下然后再播放。
经历一番波折之后完成了NaiveMediaPlayer2.0。打开首界面如下
mainpage
在CommandBar添加了一个按钮,点击会出现二级界面
secondaryPage
在文本框中输入URL,点击justPlay按钮,播放器开始播放NEUSong并显示相应title,直接播放,所以本地音乐文件夹没有文件。
justPlay
点击cacheThenPlay按钮,稍等片刻,文件即会被下载到本地音乐文件夹,可在播放器开始播放。
cache

从URL源直接播放

首先想到的就是能否直接从URL源播放文件。根据上次测试播放本地文件的经验,试着将本地的URI改为给定的URL,写出如下代码,尝试能否播放。

1
2
3
4
5
6
var mediaSource = MediaSource.CreateFromUri(new Uri("http://www.neu.edu.cn/indexsource/neusong.mp3"));
Title.Text = mediaSource.Uri.ToString();
Title.Text = Title.Text.Substring(Title.Text.LastIndexOf('/') + 1);
myPlayer.Source = mediaSource;
mediaSimple.SetMediaPlayer(myPlayer);

运行可以直接播放。第一个功能完成。

创建新窗口

然后开始想怎样设计交互方式来实现对两个功能的选择,类比于openFile时在新窗口选择文件,所以初步设想是点击playOnline按钮后,弹出新窗口。
在新窗口放一个pivot,有justPlay,cacheThenPlay两个item,做成类似于选项卡的效果。于是参考微软文档 Multi-views 和一篇blog写出如下代码

1
2
3
4
5
6
7
8
9
10
11
12
13
14
15
16
private void AppBarButton_Click_1(object sender, RoutedEventArgs e)
{
CoreApplicationView newView = CoreApplication.CreateNewView();
int newViewId = 0;
await newView.Dispatcher.RunAsync(CoreDispatcherPriority.Normal, () =>
{
Frame frame = new Frame();
frame.Navigate(sourcePageType: typeof(SecondaryPage));
Window.Current.Content = frame;
// You have to activate the window in order to show it later.
Window.Current.Activate();
newViewId = ApplicationView.GetForCurrentView().Id;
});
bool viewShown = await ApplicationViewSwitcher.TryShowAsStandaloneAsync(newViewId);
}

多窗口就是在多个view之间切换,将新Page通过Window.Current.Activate()设为active状态。至此已经可以通过点击按钮弹出新窗口了。在新的页面设置布局,参考微软 Pivot 文档写出如下代码

1
2
3
4
5
6
7
8
9
10
11
12
13
14
15
16
17
18
19
20
21
22
23
24
25
26
27
28
29
30
31
32
33
34
35
36
37
38
39
40
41
42
43
44
45
<Page
x:Class="NaiveMediaPlayer.SecondaryPage"
xmlns="http://schemas.microsoft.com/winfx/2006/xaml/presentation"
xmlns:x="http://schemas.microsoft.com/winfx/2006/xaml"
xmlns:local="using:NaiveMediaPlayer"
xmlns:d="http://schemas.microsoft.com/expression/blend/2008"
xmlns:mc="http://schemas.openxmlformats.org/markup-compatibility/2006"
mc:Ignorable="d">
<Grid Background="{ThemeResource ApplicationPageBackgroundThemeBrush}">
<Pivot Title="playOnlineSource">
<PivotItem Header="JustPlay">
<Grid>
<Grid.RowDefinitions>
<RowDefinition Height="*" />
<RowDefinition Height="Auto" />
<RowDefinition Height="*" />
</Grid.RowDefinitions>
<TextBox Name="input1" Header="URL:" PlaceholderText="http://..." Grid.Row="1"/>
<StackPanel Grid.Row="2" Orientation="Horizontal">
<Button Content="OK" Click ="Button_Click_1" Margin="50"/>
<Button Content="Cancel" Click ="Button_Click_2" Margin="50"/>
</StackPanel>
</Grid>
</PivotItem>
<PivotItem Header="CacheThenPlay">
<Grid>
<Grid.RowDefinitions>
<RowDefinition Height="*" />
<RowDefinition Height="Auto" />
<RowDefinition Height="*" />
</Grid.RowDefinitions>
<TextBox Name ="input2" Header="URL:" PlaceholderText="http://..." Grid.Row="1"/>
<StackPanel Grid.Row="2" Orientation="Horizontal">
<Button Content="OK" Click ="Button_Click_3" Margin="50"/>
<Button Content="Cancel" Click ="Button_Click_4" Margin="50"/>
</StackPanel>
</Grid>
</PivotItem>
</Pivot>
</Grid>
</Page>

每个pivot item 都有一个Textbox来输入URL,下方是两个按钮OK, Cancel。点击取消按钮时应该将新的窗口关闭,写这个事件时完全找不到参考的资料啥的,最后还是类比着Window.Current.Activate(),挨着看Window的方法列表。终于找到它!

1
2
3
4
private void Button_Click_2(object sender, RoutedEventArgs e)
{
Window.Current.Close();
}

然后在写OK按钮的时候,发现自己深陷传值的大坑无法自拔。参考各种博客尝试了传参

1
frame.Navigate(sourcePageType: typeof(SecondaryPage),Parameter: mediaPlayer);

但是不行,新page就是没有这个变量。又尝试声明全局变量,是避免传参的问题了,但是在一开始就把MediaPlayerElement和空Source的MediaPlayer绑定了,之后再修改Source仍然不能播放。

这个问题,第二天决定换个交互方式来解决,不用新窗口,直接弹一个spliteView来搞。将两个功能变成两个按钮,同样是二选一的逻辑。
在MainPage.xaml中添加如下代码:

1
2
3
4
5
6
7
8
9
10
11
12
13
14
15
16
17
18
19
20
21
22
23
24
25
26
27
<SplitView IsPaneOpen="False"
DisplayMode="Inline"
PanePlacement="Right"
OpenPaneLength="400" Name="choice" Grid.Row="1" >
<SplitView.Pane>
<Grid>
<Grid.ColumnDefinitions>
<ColumnDefinition Width="auto"/>
</Grid.ColumnDefinitions>
<Grid.RowDefinitions>
<RowDefinition Height="*"/>
<RowDefinition Height="auto"/>
<RowDefinition Height="auto" />
<RowDefinition Height="*"/>
</Grid.RowDefinitions>
<TextBox Name ="inputUrl" Header="URL:" PlaceholderText="http://..." Grid.Row="1" Grid.ColumnSpan="2"
Width ="268"
VerticalAlignment="Center" HorizontalAlignment="Center"/>
<Button Content="justPlay" Click ="Button_Click" Margin="50" Grid.Row="2" Grid.Column="0"/>
<Button Content="cacheThenPlay" Click ="Button_Click_1" Margin="50" Grid.Row="2" Grid.Column="1"/>
</Grid>
</SplitView.Pane>
</SplitView>

仍然不明白,讲道理Window和page用的都是一个navigate 方法,page间直接传参就行,怎么这个window就不可以吶。可能是当时写的有问题。不过这里传参只能传一个,还是不能实现之前设想的效果。还是换spliteView吧。

缓存文件

缓存文件就是读写文件,通过参看微软 Create, write, and read a file 文档,需要先new 一个 folder,然后调用folder的方法在其路径下新建文件。
又参考微软 Files and folders in the Music, Pictures, and Videos libraries 文档得知可用如下代码获得Folder:

1
var myPictures = await Windows.Storage.StorageLibrary.GetLibraryAsync(Windows.Storage.KnownLibraryId.Pictures);

写出如下代码:

1
2
3
4
5
6
7
8
9
private async void Button_Click_1(object sender, RoutedEventArgs e)
{
choice.IsPaneOpen = false;
String inputU = inputUrl.Text.ToString();
if (inputU == "") return;
var myfolder = KnownFolders.MusicLibrary;
String fileName = inputU.Substring(inputU.LastIndexOf('/') + 1);
StorageFile cacheFile = await myfolder.CreateFileAsync(fileName,CreationCollisionOption.ReplaceExisting);
}

但是只有这样是不行的,又参考这篇blog了解到,想要使用系统文件夹,需要设置应用程序-包清单-勾选音乐库。解决权限不够的问题。
创建文件之后怎么将URL源的文件写入创建的文件呢?研究了好大会儿写文件,但是没有从URL源直接写的。然后尝试直接从URL源创建文件,也没啥资料,就是各种试StorageFile的方法列表里带Uri的方法。找到一个StorageFile.CreateStreamedFileFromUriAsync()的方法,然鹅直接用会抛异常。
然后就又搜索这个方法的资料,然后!非常意外的在Stack Overflow找到了另一种解决方法:

1
2
3
4
5
StorageFolder fileFolder = await ApplicationData.Current.LocalFolder.GetFolderAsync("MyFiles");
StorageFile file =await fileFolder.CreateFileAsync(filename, CreationCollisionOption.ReplaceExisting);
var download = new BackgroundDownloader().CreateDownload(source, file);
await download.StartAsync();

从源直接下载到目标文件,非常nice。写出如下代码解决了第二个功能:

1
2
3
4
5
6
7
8
9
10
11
12
13
14
15
16
17
private async void Button_Click_1(object sender, RoutedEventArgs e)
{
choice.IsPaneOpen = false;
String inputU = inputUrl.Text.ToString();
if (inputU == "") return;
var myfolder = KnownFolders.MusicLibrary;
String fileName = inputU.Substring(inputU.LastIndexOf('/') + 1);
StorageFile cacheFile = await myfolder.CreateFileAsync(fileName,CreationCollisionOption.ReplaceExisting);
var download = new BackgroundDownloader().CreateDownload(new Uri(inputU), cacheFile);
await download.StartAsync();
var cacheMediaSource = MediaSource.CreateFromStorageFile(cacheFile);
myPlayer.Source = cacheMediaSource;
mediaSimple.SetMediaPlayer(myPlayer);
Title.Text = fileName;
}

总结

出现错误时还是要认真研究报错信息哇,这样才能更快解决问题;
回看代码感觉犯了老师第一节课说的错误,一个button为什么要知道怎么获取json哇。同样这里一个button为什么要知道怎么从URL下载文件,怎么创建文件,设置播放器哇。没有好好封装起来。敲代码的时候只是简单的想着实现功能就好,没有考虑代码的结构啥的。

The Plan of Our Final Project,NEU-TV Player

发表于 2018-04-09

小组头脑风暴了几个idea,最终经过投票,在幽灵般的第五票下决定了我们的项目主题:NEU-TV Player。项目将在我们已有的视频播放器经验上进行开发,并添加一些有趣的功能。

项目描述

描述

一个基于东北大学IPV6视频直播源的弹幕视频播放器。

功能

观看节目

涵盖中央、地方各大卫视频道,内容覆盖电影、音乐、体育、卡通应有尽有。只要连接校园网,打开本应用,在电视墙内选择你中意的频道,轻轻一点尽享缤纷精彩。

频道搜索

频道太多眼花缭乱找不到想要的那一个?有想看的节目却不知道是在哪个频道?想回看某部电影却忘了之前是在什么时候播出?只要点击搜索栏,输入你想看的频道或节目名称,我们为你锁定它!

弹幕吐槽

快乐分享给他人会加倍快乐,那么和别人一起吐槽就更是爽翻天啦。不管是背景科普还是高能预警,通过弹幕分享你的观看体验,即使是一个人也能享受大家一起看电视的快乐!

收藏回看

最近在追某项比赛,然而每次都要搜索体育频道很麻烦呐!不要急,收藏这个频道,让你直接追上比赛热点。
最近在追某部剧,然鹅某一天学业繁忙漏看了!不要方,点开节目单回看即可,最长支持7天内的视频回看哟,可以养肥后周末一口气追更。

特色

4-video

免流量

只要连接校园网,不登录账号也可直接观看视频。追剧看球再也不怕流量不够了!校园网完美覆盖,走到哪里看到哪里。

无广告

超清流畅无码节目源点开即看,没有烦人的弹窗广告,也没有煎熬的等待90s,毕竟你的时间,非常宝贵。

可互动

通过弹幕和小伙伴分享自己的观影体验,吐槽视频的各种梗,你的弹幕可能比视频更加好玩!

可补漏

收藏你喜欢的频道,免去搜索的麻烦。回看一周内的视频,错过直播也不怕!

项目设计

主界面

4-design1
上方是标签页,通过标签页来对不同类别频道进行分类展示。标签页右侧是一个小的搜索栏。标签页下是页面主体,通过照片墙的方式来展示该类别的各个频道。点击照片即可进入对应频道观看视频。

搜索页

4-design2
通过点击主页面的搜索栏可以转到搜索功能,动画是搜索栏向左延长横跨整个页面,上方的标签页消失,下方照片墙展示搜索结果。

播放页

4-design3
播放页面主要分为两部分,左侧为节目单,右侧为播放器。左侧,通过标签页展示周一到周日七天的节目单,对应日期的节目单通过垂直方向的列表显示,点击某一节目即可在播放器中回看该节目。
右侧,播放器类似于普通播放器,有播放/暂停按钮,进度条,音量调整,全屏按钮等。播放器下方是弹幕功能区。主要有一个文本编辑框和发送按钮构成 。文本框内输入文字,并选择不同的弹幕格式,然后点击发送按钮即可发送弹幕。

市场调查

小方对三位小伙伴进行了采访。先通过视频介绍我们的App,然后提问一些相关问题来帮助我们进行调整,最后将视频剪辑打码发布。
一个制作精良超级棒的视频

但是分析采访内容,大家对我们的鼓励支持远远大于批评和建议,我们自己又深刻反思分析了一下,提出如下改进:

搜索页面改进

搜索功能应当细化到具体节目才更有意义,但是照片墙只能展示到频道。所以对之前通过照片墙展示搜索结果的方式进行改进。点击搜索按钮后跳至新的页面,通过列表展示搜索结果。

播放控制改进

在播放器上,因为新加了弹幕功能,所以相应的也要加上关闭弹幕的功能。需要重写控制器。

技术分析

在确定设计之后,代锟dalao根据设计图与讨论的功能,对每个页面可能用到的技术及实现方法进行了分析。

主页面

4-design1

标签页

不得不说,我最喜欢的浏览器是firefox和chrome,尤其是chrome的标签页的设计实在是太讨喜了,一点也不拖泥带水。然而,我google了半天,没有找到等腰梯形可重叠标签页的uwp现有的成熟实现方案。捉急之下我询问了老师,
然后找到了类似的解决方案。
大体的解决方案是这样的:

1
2
3
4
5
6
7
<ListBox>
<ListBox.ItemsPanel>
<ItemsPanelTemplate>
<StackPanel Orientation="Horizontal"/>
</ItemsPanelTemplate>
</ListBox.ItemsPanel>
</ListBox>

用一个stackpanel做模板?大概是这个意思,把它水平放过来

1
2
3
4
5
6
7
8
9
10
<Style TargetType="ListBox">
<!-- Rest of the style -->
<Setter Property="ItemsPanel">
<Setter.Value>
<ItemsPanelTemplate>
<StackPanel Orientation="Horizontal"/>
</ItemsPanelTemplate>
</Setter.Value>
</Setter>
</Style>

增加style
用一个水平方向排列的ListBox来解决标签页的问题,然而,仅仅拥有标签页是不够的

然而,这并不能解决这个问题
lablePage

没错,根本无法实现这种边的交替效果,而且也不具有chrome的那种随着标签页增加而标签缩短的效果。
好菜啊,从没有学过uwp的我,居然要定制UI耶QAQ。
那算了,实际一点,先使用edge和firefox那种扁平化的风格堆叠吧,那个稍微简单,而且我们先不考虑标签页增加而标签缩短的问题。

搜索栏

这个功能可以使用AutoSuggestBox来实现
basic code:

1
public sealed class AutoSuggestBox : ItemsControl, IAutoSuggestBox, IAutoSuggestBox2, IAutoSuggestBox3

1
<AutoSuggestBox .../>

官方demo :

1
2
3
4
5
6
7
8
9
10
11
12
13
14
15
16
17
18
19
20
21
22
23
24
25
26
27
28
29
30
31
// C#
private void AutoSuggestBox_TextChanged(AutoSuggestBox sender, AutoSuggestBoxTextChangedEventArgs args)
{
// Only get results when it was a user typing,
// otherwise assume the value got filled in by TextMemberPath
// or the handler for SuggestionChosen.
if (args.Reason == AutoSuggestionBoxTextChangeReason.UserInput)
{
//Set the ItemsSource to be your filtered dataset
//sender.ItemsSource = dataset;
}
}
private void AutoSuggestBox_SuggestionChosen(AutoSuggestBox sender, AutoSuggestBoxSuggestionChosenEventArgs args)
{
// Set sender.Text. You can use args.SelectedItem to build your text string.
}
private void AutoSuggestBox_QuerySubmitted(AutoSuggestBox sender, AutoSuggestBoxQuerySubmittedEventArgs args)
{
if (args.ChosenSuggestion != null)
{
// User selected an item from the suggestion list, take an action on it here.
}
else
{
// Use args.QueryText to determine what to do.
}
}

这三个函数使用来分别监听前端搜索字体改变,搜索请求提交,给出建议等事件的处理函数

前端demo:

1
2
3
4
<AutoSuggestBox PlaceholderText="Search" QueryIcon="Find" Width="200"
TextChanged="AutoSuggestBox_TextChanged"
QuerySubmitted="AutoSuggestBox_QuerySubmitted"
SuggestionChosen="AutoSuggestBox_SuggestionChosen"/>

其中,PlaceholderText代表默认的占用字符串
Icon用的微软官方自带的图标
TextChanged=”AutoSuggestBox_TextChanged”
QuerySubmitted=”AutoSuggestBox_QuerySubmitted”
SuggestionChosen=”AutoSuggestBox_SuggestionChosen”
这三条对应后端的三个句柄(handle),用来处理相应的事件demo(but),原本在我们组dalao的设定中要点击搜索栏的时候搜索烂要有一个平滑延长的动画,然后标签页消失,最后过度到页面二的画面。我…..被水淹没不知所措。

后来了解到了一种解决方案,就是用StoryBoard做动画
具体的方法还没有做出来,但是还可以参考其他方案
https://docs.microsoft.com/en-us/uwp/api/windows.ui.xaml.media.animation.storyboard
basic demo

1
public sealed class Storyboard : Timeline, IStoryboard

1
2
3
<Storyboard ...>
  oneOrMoreChildTimelines
</Storyboard>

这种控件细究起来还是有很多拓展性的
先上官方demo:

1
2
3
4
5
6
7
8
9
10
11
12
13
14
15
16
17
18
19
20
21
22
23
24
25
26
27
28
29
30
31
32
33
34
35
36
37
38
39
40
41
42
43
44
45
46
47
48
49
//using Windows.UI.Xaml.Media.Animation;
//using Windows.UI.Xaml.Shapes;
//using Windows.UI
private void Create_And_Run_Animation(object sender, RoutedEventArgs e)
{
// Create a red rectangle that will be the target
// of the animation.
Rectangle myRectangle = new Rectangle();
myRectangle.Width = 200;
myRectangle.Height = 200;
SolidColorBrush myBrush = new SolidColorBrush(Colors.Red);
myRectangle.Fill = myBrush;
// Create the transform
TranslateTransform moveTransform = new TranslateTransform();
moveTransform.X = 0;
moveTransform.Y = 0;
myRectangle.RenderTransform = moveTransform;
// Add the rectangle to the tree.
LayoutRoot.Children.Add(myRectangle);
// Create a duration of 2 seconds.
Duration duration = new Duration(TimeSpan.FromSeconds(2));
// Create two DoubleAnimations and set their properties.
DoubleAnimation myDoubleAnimationX = new DoubleAnimation();
DoubleAnimation myDoubleAnimationY = new DoubleAnimation();
myDoubleAnimationX.Duration = duration;
myDoubleAnimationY.Duration = duration;
Storyboard justintimeStoryboard = new Storyboard();
justintimeStoryboard.Duration = duration;
justintimeStoryboard.Children.Add(myDoubleAnimationX);
justintimeStoryboard.Children.Add(myDoubleAnimationY);
Storyboard.SetTarget(myDoubleAnimationX, moveTransform);
Storyboard.SetTarget(myDoubleAnimationY, moveTransform);
// Set the X and Y properties of the Transform to be the target properties
// of the two respective DoubleAnimations.
Storyboard.SetTargetProperty(myDoubleAnimationX, "X");
Storyboard.SetTargetProperty(myDoubleAnimationY, "Y");
myDoubleAnimationX.To = 200;
myDoubleAnimationY.To = 200;
// Make the Storyboard a resource.
LayoutRoot.Resources.Add("justintimeStoryboard", justintimeStoryboard);
// Begin the animation.
justintimeStoryboard.Begin();
}

这个动画一共有四个部分,创建的时候也会有动画

1
2
3
4
5
6
7
8
9
10
11
12
13
14
15
16
17
18
19
20
21
22
23
24
25
26
27
28
29
30
31
32
33
34
35
36
37
38
<StackPanel x:Name="LayoutRoot" >
<StackPanel.Resources>
<Storyboard x:Name="myStoryboard">
<DoubleAnimation From="1" To="6" Duration="00:00:6"
Storyboard.TargetName="rectScaleTransform"
Storyboard.TargetProperty="ScaleY">
<DoubleAnimation.EasingFunction>
<BounceEase Bounces="2" EasingMode="EaseOut"
Bounciness="2" />
</DoubleAnimation.EasingFunction>
</DoubleAnimation>
</Storyboard>
</StackPanel.Resources>
<!-- Button that begins animation. -->
<Button Click="Animation_Begin"
Margin="2" Content="Begin" />
<!-- Button that pauses Animation. -->
<Button Click="Animation_Pause"
Margin="2" Content="Pause" />
<!-- Button that resumes Animation. -->
<Button Click="Animation_Resume"
Margin="2" Content="Resume" />
<!-- Button that stops Animation. Stopping the animation
returns the ellipse to its original location. -->
<Button Click="Animation_Stop"
Margin="2" Content="Stop" />
<Rectangle Fill="Blue" Width="200" Height="30">
<Rectangle.RenderTransform>
<ScaleTransform x:Name="rectScaleTransform" />
</Rectangle.RenderTransform>
</Rectangle>
</StackPanel>

这个扩展性非常强,每一个事件发生都可以调用相对应的story board的产生的animation

1
2
3
4
5
6
7
8
9
10
11
12
13
14
15
16
private void Animation_Begin(object sender, RoutedEventArgs e)
{
myStoryboard.Begin();
}
private void Animation_Pause(object sender, RoutedEventArgs e)
{
myStoryboard.Pause();
}
private void Animation_Resume(object sender, RoutedEventArgs e)
{
myStoryboard.Resume();
}
private void Animation_Stop(object sender, RoutedEventArgs e)
{
myStoryboard.Stop();
}

当我们设定好动画之后,就可以体验到那种顺滑的感觉

搜索页面

4-design2

搜索栏

这个我之前已经提到过了,这里不再细讲

节目缩略图

这个图片来源主要来自于后端提供,简单来说,其实就是Image这个博客就有一个很好的demo来展示如何显示出一个图片墙。
不过他是用的某种选择文件夹的方式,我们改改也就可以用了,用服务器的某个文件夹这样?

1
2
3
4
5
6
7
8
9
10
11
12
13
14
15
16
17
18
19
20
21
22
23
24
25
26
27
28
29
30
31
32
33
34
35
36
37
38
39
40
41
42
43
44
45
46
47
48
49
50
51
52
53
54
55
56
57
58
StorageFile fileLocal = await StorageFile.GetFileFromApplicationUriAsync(new Uri("ms-appdata:///local/account/" + ImageHelper.folderStr + ".json"));
if (fileLocal != null)
{
try
{
//读取本地文件内容,并且反序列化
using (IRandomAccessStream readStream = await fileLocal.OpenAsync(FileAccessMode.Read))
{
using (DataReader dataReader = new DataReader(readStream))
{
UInt64 size = readStream.Size;
if (size <= UInt32.MaxValue)
{
await dataReader.LoadAsync(sizeof(Int32));
Int32 stringSize = dataReader.ReadInt32();
await dataReader.LoadAsync((UInt32)stringSize);
string fileContent = dataReader.ReadString((uint)stringSize);
ImagePath imagePath = new ImagePath(fileContent);
StorageFolder folder = await StorageApplicationPermissions.FutureAccessList.GetFolderAsync(imagePath.Path);
//筛选图片
var queryOptions = new Windows.Storage.Search.QueryOptions();
queryOptions.FileTypeFilter.Add(".png");
queryOptions.FileTypeFilter.Add(".jpg");
queryOptions.FileTypeFilter.Add(".bmp");
var query = folder.CreateFileQueryWithOptions(queryOptions);
var files = await query.GetFilesAsync();
ImagePath img;
imgList = new ObservableCollection<ImagePath>();
foreach (var item in files)
{
IRandomAccessStream irandom = await item.OpenAsync(FileAccessMode.Read);
//对图像源使用流源
BitmapImage bitmapImage = new BitmapImage();
bitmapImage.DecodePixelWidth = 160;
bitmapImage.DecodePixelHeight = 100;
await bitmapImage.SetSourceAsync(irandom);
img = new ImagePath();
img.Path = item.Path;
img.File = bitmapImage;
img.Storage = item;
imgList.Add(img);
}
imageView.ItemsSource = imgList;
}
}
}
}
catch (Exception exce)
{
await new MessageDialog(exce.ToString()).ShowAsync();
throw exce;
}
}

效果图
avatar

播放页面

4-design3

回看标签

这个之前已经讲过,定制过的listbox就是解决方案,只不过把水平方向换成垂直方向
当然,如果可以我还是想弄成等腰梯形(

回看节目栏

StackPanel就可以搞定,当然还需要定制一下ui,但是这个回看栏的翻页方式,目前我们还没有决定,是继续沿用纵向滚动的方式来加载往期节目(当然,只是滚动太low了,如果是我我也许会考虑使用异步加载来增加用户体验,用动画来掩盖加载慢的事实,用来让用户产生好流畅好惊艳的错觉,就像苹果公司经常干的。。。。。辱果了,异教徒!处死!)
还可以在stackpanel最后加入两个按钮,用来横向翻页。。。这个也挺简单的,stackpanel套两个水平的button,当然button的图案上要使用箭头作为图标,具体怎么加图标嘛
https://stackoverflow.com/questions/41191758/uwp-xaml-how-to-display-a-button-with-icon-and-text-in-it
这个老哥的解释和代码我们可以看看

1
2
3
4
5
6
<Button>
<StackPanel>
<Image/>
<TextBlock/>
</StackPanel>
</Button>

这样可以让button上面有多重存在了

1
<Image Width="200" Source="Images/myimage.png"/>

然后像这样设置一下icon就好了,icon的来源嘛
百度呀,谷歌呀,一大堆

  • iconfinder
    https://www.iconfinder.com/

  • 阿里的
    http://iconfont.cn/collections/detail?cid=918

  • easy icon
    https://www.easyicon.net/

p.s. 补充,这里回看节目单的效果个人认为也可以做一个ListView的列表滑动特效,不考虑加载速度etc.就是觉得这样的动态效果比较活泼。实现可以参照一篇博客。

弹幕/评论区

这种很简单的文本堆叠区域用stack panel + text block很容易实现

弹幕/评论输入栏

TextBox就可以了,提交给后端,后端存到相对应的数据库

弹幕/评论发送按钮

一个button就可以了,设置一下onclick,上面的文本和图标已经提到过了

视频播放器

1
2
3
4
5
6
7
<MediaPlayerElement
Name="MediaPlayer" AutoPlay="False"
Grid.Row="0" Grid.Column="0"
Grid.RowSpan="3" Grid.ColumnSpan="3"
Visibility="Collapsed"
AreTransportControlsEnabled="True"
/>

之前已经写过类似的小作业了,很简单的调用一下api就好了
具体的代码可以看一下我的小作业
https://github.com/HallWoodZhang/SimpleMediaPlayer_UWP
注释
https://blog.csdn.net/hall_wood/article/details/79788564

(扩展)弹幕显示层

陷入江局.jpg
这个应该是最难的部分了。。。
这个问题的解决方案,应该是现有的,首先,我们应该明确一个问题,弹幕是不是可以实时更新?
如果可以实时更新,就像挂鱼直播那样的(呸),或者youtube那样的评论浮现方式,都不太好实现,可能涉及到一些websocket的实现(todo: extention # 1)

  • 那么,有没有一种方法可以偷懒呢?

干脆就不要实时更新弹幕了,那这就好解决了,每次打开视频,就加载某个danmaku(b站确实就叫这个)文件,然后用某种形式显示在媒体播放器上,每次有人发弹幕,就先存起来,然后刷新页面就可以看到更新的danmaku了
以前我用you-get爬某个大型同性交友网站视频的时候,爬到的弹幕库文件都是xml格式的,我们可以学习一个,约定好储存格式,能够适用于校园网用户规模的用户访问就行了

储存和发送的方法定好了,我们该如何显示弹幕,就是之后需要讨论的问题了,近年来有许多现成的实现代码,我们可以考虑参考一下他们的经验,然后自己改进一下

https://github.com/SkylarkWorkshop/SkylarkWsp.DanmakuEngine
ORZ已经有大佬实现了uwp弹幕库的引擎了,惊了!
看看接口学习一个,看看自己是否能DIY一下
真的是大佬吃肉,菜鸡喝汤就能够不饿死的时代啊,感谢上帝赐我大佬

目前我们还没有完全确定是否要加弹幕,毕竟工作量不小,但是网上(某hub)还是有实现弹幕视频网站的实例的
我们可以看看别人是怎么实现弹幕图层的
https://github.com/DaweiX/bilibili

1
2
3
4
5
6
7
8
9
10
11
12
13
14
15
16
17
18
19
20
21
22
23
24
25
26
27
28
29
30
31
32
33
34
35
36
37
38
<UserControl
x:Class="bilibili.Controls.Danmaku"
xmlns="http://schemas.microsoft.com/winfx/2006/xaml/presentation"
xmlns:x="http://schemas.microsoft.com/winfx/2006/xaml"
xmlns:local="using:bilibili.Controls"
xmlns:d="http://schemas.microsoft.com/expression/blend/2008"
xmlns:mc="http://schemas.openxmlformats.org/markup-compatibility/2006"
mc:Ignorable="d"
d:DesignHeight="300"
d:DesignWidth="400"
SizeChanged="UserControl_SizeChanged">
<Grid>
<Grid.RowDefinitions>
<RowDefinition Height="3*"/>
<RowDefinition Height="*"/>
</Grid.RowDefinitions>
<Grid x:Name="grid_0">
<Grid.RowDefinitions>
<RowDefinition x:Name="r1"/>
<RowDefinition x:Name="r2"/>
<RowDefinition x:Name="r3"/>
<RowDefinition x:Name="r4"/>
<RowDefinition x:Name="r5"/>
<RowDefinition x:Name="r6"/>
<RowDefinition x:Name="r7"/>
<RowDefinition x:Name="r8"/>
<RowDefinition x:Name="r9"/>
<RowDefinition x:Name="r10"/>
<RowDefinition x:Name="space"/>
</Grid.RowDefinitions>
</Grid>
<Grid x:Name="grid_1" Grid.RowSpan="2">
<StackPanel x:Name="top" VerticalAlignment="Top"/>
<StackPanel x:Name="bottom" VerticalAlignment="Bottom"/>
</Grid>
</Grid>
</UserControl>

这位仁兄把一个空间上的grid分成了10行用来显示弹幕

1
2
3
4
5
6
7
8
9
10
11
12
13
14
15
16
17
18
19
20
21
22
23
24
25
26
27
28
29
30
31
32
33
34
35
36
37
38
39
40
41
42
43
44
45
46
47
48
49
50
51
52
53
54
55
56
57
58
59
60
61
62
63
64
65
66
67
68
69
70
71
72
73
74
75
76
77
78
79
80
81
82
83
84
85
86
87
88
89
90
91
92
93
94
95
96
97
98
99
100
101
102
103
104
105
106
107
108
109
110
111
112
113
114
115
116
117
118
119
120
121
122
123
124
125
126
127
128
129
130
131
132
133
134
135
136
137
138
139
140
141
142
143
144
145
146
147
148
149
150
151
152
153
154
155
156
157
158
159
160
161
162
163
164
165
166
167
168
169
170
171
172
173
174
175
176
177
178
179
180
181
182
183
184
185
186
187
188
189
190
191
192
193
194
195
196
197
198
199
200
201
202
203
204
205
206
207
208
209
210
211
212
213
214
215
216
217
218
219
220
221
222
223
224
225
226
227
228
229
230
231
232
233
234
235
236
237
238
239
240
241
242
243
244
245
246
247
248
249
250
251
252
253
254
255
256
257
258
259
260
261
262
263
264
265
266
267
268
269
270
271
272
273
274
275
276
277
278
279
280
281
282
283
284
285
286
287
288
289
290
291
292
293
294
295
296
297
298
299
300
301
302
303
304
305
306
307
308
309
310
311
312
313
314
315
316
317
318
319
320
321
322
323
324
325
326
327
328
329
330
331
332
333
334
335
336
337
338
339
using bilibili.Helpers;
using System;
using System.Threading.Tasks;
using Windows.UI;
using Windows.UI.Core;
using Windows.UI.Xaml;
using Windows.UI.Xaml.Controls;
using Windows.UI.Xaml.Media;
using Windows.UI.Xaml.Media.Animation;
// The User Control item template is documented at http://go.microsoft.com/fwlink/?LinkId=234236
namespace bilibili.Controls
{
public sealed partial class Danmaku : UserControl
{
int row = 0;
int speed = 8;
int fontsize = 21;
bool isPause = false;
string font = "默认";
public Danmaku()
{
this.InitializeComponent();
speed = SettingHelper.GetValue("_speed") != null ? int.Parse(SettingHelper.GetValue("_speed").ToString()) : 8;
if (SettingHelper.GetValue("_space") != null)
{
int value = int.Parse(SettingHelper.GetValue("_space").ToString());
ChangeSpace(value);
}
else
{
ChangeSpace(0);
}
}
/// <summary>
/// 添加滚动弹幕
/// </summary>
/// <param name="model"></param>
public async void AddBasic(DanmuModel model ,bool isMyDanmu)
{
TextBlock txt1 = new TextBlock
{
Foreground = model.DanColor,
FontFamily = new FontFamily(font)
};
TextBlock txt2 = new TextBlock
{
Foreground = new SolidColorBrush(Colors.Black),
FontFamily = new FontFamily(font),
Margin = new Thickness(1),
};
Grid grid = new Grid
{
HorizontalAlignment = HorizontalAlignment.Left,
VerticalAlignment = VerticalAlignment.Top,
DataContext = model,
};
if (isMyDanmu)
{
grid.BorderBrush = new SolidColorBrush(Colors.HotPink);
grid.BorderThickness = new Thickness(2);
}
double size = double.Parse(model.Size);
if (size == 25)
{
txt2.FontSize = fontsize;
txt1.FontSize = fontsize;
}
else
{
txt2.FontSize = fontsize - 4;
txt1.FontSize = fontsize - 4;
}
txt1.Text = txt2.Text = model.Message;
grid.Children.Add(txt2);
grid.Children.Add(txt1);
TranslateTransform move = new TranslateTransform();
move.X = grid_0.ActualWidth;
grid.RenderTransform = move;
grid_0.Children.Add(grid);
Grid.SetRow(grid, row);
row++;
if (row == 10)
row = 0;
grid.DataContext = model;
grid.UpdateLayout();
Storyboard sty = new Storyboard();
DoubleAnimation ani = new DoubleAnimation
{
Duration = new Duration(TimeSpan.FromSeconds(speed)),
To = -(grid.ActualWidth),
};
sty.Children.Add(ani);
Storyboard.SetTarget(ani, move);
Storyboard.SetTargetProperty(ani, "X");
grid.Resources.Remove("justintimeStoryboard");
grid.Resources.Add("sty", sty);
sty.Begin();
await Task.Run(async () =>
{
int i = 0;
while (true)
{
if (isPause)
{
await this.Dispatcher.RunAsync(CoreDispatcherPriority.Normal, () => {
sty.Pause();
});
}
else
{
if (i == speed * 2)
{
break;
}
i++;
await this.Dispatcher.RunAsync(CoreDispatcherPriority.Normal, () => {
sty.Resume();
});
}
await Task.Delay(500);
}
});
grid_0.Children.Remove(grid);
}
public void IsPauseDanmaku(bool isAction)
{
isPause = isAction;
}
public void Setfont(string fontname)
{
font = fontname;
}
/// <summary>
/// 弹幕间距
/// </summary>
public void ChangeSpace(int value)
{
double h = 0;
double actualHeight = r1.ActualHeight;
switch (value)
{
case 0:
h = 2;break;
case 1:
h = 4;break;
case 2:
h = 8;break;
}
space.Height = new GridLength(h, GridUnitType.Pixel);
}
/// <summary>
/// 弹幕速度
/// </summary>
/// <param name="value"></param>
public void ChangeSpeed(int value)
{
speed = value;
}
/// <summary>
/// 弹幕字号
/// </summary>
/// <param name="value"></param>
public void ChangeSize(int value)
{
switch(value)
{
case 0:fontsize = 14;break;
case 1: fontsize = 16; break;
case 2: fontsize = 21; break;
case 3: fontsize = 25; break;
}
}
/// <summary>
/// 添加顶部和底部弹幕
/// </summary>
/// <param name="model"></param>
public async void AddTop(DanmuModel model, bool isMyDanmu)
{
TextBlock txt1 = new TextBlock
{
Foreground = model.DanColor,
FontFamily = new FontFamily(font),
};
TextBlock txt2 = new TextBlock
{
Foreground = new SolidColorBrush(Colors.Black),
Margin = new Thickness(1),
FontFamily = new FontFamily(font),
};
Grid grid = new Grid
{
HorizontalAlignment = HorizontalAlignment.Center,
VerticalAlignment = VerticalAlignment.Top,
DataContext = model,
};
if (isMyDanmu)
{
grid.BorderBrush = new SolidColorBrush(Colors.HotPink);
grid.BorderThickness = new Thickness(2);
}
double size = double.Parse(model.Size);
if (size == 25)
{
txt2.FontSize = fontsize;
txt1.FontSize = fontsize;
}
else
{
txt2.FontSize = fontsize - 4;
txt1.FontSize = fontsize - 4;
}
txt1.Text = txt2.Text = model.Message;
grid.Children.Add(txt2);
grid.Children.Add(txt1);
grid.UpdateLayout();
if (model.Mode == "5")
{
top.Children.Add(grid);
await Task.Delay(5000);
if (!isPause)
{
top.Children.Remove(grid);
}
}
else if (model.Mode == "4")
{
bottom.Children.Add(grid);
await Task.Delay(5000);
if (!isPause)
{
bottom.Children.Remove(grid);
}
}
}
/// <summary>
/// 清除弹幕
/// </summary>
public void ClearDanmu()
{
grid_0.Children.Clear();
top.Children.Clear();
bottom.Children.Clear();
}
/// <summary>
/// 清除顶部和底部
/// </summary>
public void ClearStaticDanmu()
{
top.Children.Clear();
bottom.Children.Clear();
}
public void ClearGun(bool isvisual)
{
grid_0.Visibility = isvisual ? Visibility.Visible : Visibility.Collapsed;
}
public void ClearBottom(bool isvisual)
{
bottom.Visibility = isvisual ? Visibility.Visible : Visibility.Collapsed;
}
public void ClearTop(bool isvisual)
{
top.Visibility = isvisual ? Visibility.Visible : Visibility.Collapsed;
}
public class DanmuModel
{
public string aid { get; set; }
public string Message { get; set; }
private decimal time;
public decimal Time
{
get { return time; }
set { time = value; }
}
/// <summary>
/// 3 滚动弹幕 4底端弹幕 5顶端弹幕 6.逆向弹幕 7精准定位 8高级弹幕
/// </summary>
public string Mode { get; set; }
public string Size { get; set;}
public string Color { get; set; }
public SolidColorBrush color { get; set; }
public SolidColorBrush DanColor
{
get
{
try
{
Color = Convert.ToInt32(Color).ToString("X2");
if (Color.StartsWith("#"))
Color = Color.Replace("#", string.Empty);
int v = int.Parse(Color, System.Globalization.NumberStyles.HexNumber);
SolidColorBrush solid = new SolidColorBrush(new Color()
{
A = Convert.ToByte(255),
R = Convert.ToByte((v >> 16) & 255),
G = Convert.ToByte((v >> 8) & 255),
B = Convert.ToByte((v >> 0) & 255)
});
color = solid;
return solid;
}
catch (Exception)
{
SolidColorBrush solid = new SolidColorBrush(new Color()
{
A = 255,
R = 255,
G = 255,
B = 255
});
color = solid;
return solid;
}
}
}
}
private void UserControl_SizeChanged(object sender, SizeChangedEventArgs e)
{
if (ActualHeight < 500)
{
fontsize = 16;
}
else
{
fontsize = 21;
}
}
}
}

这个是这位仁兄的后端代码,可以说是十分规整,解决了我们如何显示弹幕在某一控件上的问题

那么问题来了,我们如何把这个控件和微软自带的媒体播放器接合在一起呢?
这需要我们进一步讨论解决方案,是采用bilibili uwp端的代码改装呢,还是使用现有的弹幕引擎,这仍然待定

毕竟,我们有可能压根就不实现这个功能。。。。

总结

只做了一点微小的工作很惭愧。队里氛围很好哇,dalao们都非常可爱。只是一讨论就会给自己不断挖坑,目前新增一坑缓存视频功能。
软件工程还是很重要的,避免疯狂堆加功能,开发模型有利于把握开发进度。还是要学习一个。

Naive Media Player

发表于 2018-03-31

简单实现了一个Naive Media Player两次。
为什么是两次呢,因为在第一次写完同步到github上时,手抖删除了对分支的更改。怒删重写后被dalao告知可以恢复呀QAQ。
得到惨痛教训珍爱生命,远离手抖;珍爱生命,学好git。重写完后觉得第二次画的背景图更interesting,就换了几张截图,故几张图细节可能有变动。
打开首页如下
open
可点击右上角选择打开文件
openfiles
播放视频效果如下
video
播放音频效果如下,会直接显示背景
audio
以下是在实现过程中考虑到的和遇到的问题

播放视频、音频

首先想到的问题就是如何播放视频和音频。刚开始参考了XAML Controls Gallery,其中的介绍 和演示都非常简单。我尝试使用以下代码却发现并不能播放视频。

1
2
3
4
5
<MediaPlayerElement Source="/Assets/test.mp4"
MaxWidth="400"
AutoPlay="False"
AreTransportControlsEnabled="True" />
}

VS会报出两个错误,一个是当前平台支持的最低版本不支持 MediaPlayerElement,二是Convert不能直接将String转换为Source。第一个问题可以通过修改 调试-属性-应用程序 中修改最低版本来解决。
第二个问题大概意思就是不能通过String类型的文件路径转换为Source了类型的。所以我又参考了MS官方文档中Play a media file with MediaPlayer
与Use MediaPlayerElement to render video in XAML
大概理解了如何使用这两个控件。即在XAML中放置控件MediaPlayerElement,但不在XAML中设置该控件的source之类的属性,只设置与界面有关的;在.cs文件中声明 MediaPlayer,并在.cs中设置其source,然后将XAML中的PlayerElement的播放器绑定为.cs中的MediaPlayer。
的确这样写更好,在XAML文件中设置布局与控件,在.cs中写逻辑。代码如下:

1
2
3
4
5
6
7
<MediaPlayerElement x:Name="mediaSimple"
AutoPlay="False"
AreTransportControlsEnabled="True"
IsEnabled="True"
Grid.Row="1"
/>
}

1
2
3
MediaPlayer myPlayer = new MediaPlayer();
myPlayer.Source = MediaSource.CreateFromUri(new Uri("ms-appx:///Assets/test.mp4"));
mediaSimple.setMediaPlayer(myPlayer);

然而仍然无法播放QAQ!在小方的帮助下,解决了这个问题。因为用的test.mp4文件放在了Assets文件夹下但是并没有在VS中吧该文件添加到项目里。在解决方案资源管理器中右键-添加-已有项目,选择test.mp4。

选择文件

选择文件按钮

界面需要一个按钮来选择文件,这里选择了在第一行添加CommandBar,CommandBar的content来显示打开的文件名,AppButton来选择要打开的文件。参考了文档Command Bar

1
2
3
4
5
6
<CommandBar DefaultLabelPosition="Right" IsOpen="False" Grid.Row="0">
<CommandBar.Content>
<TextBlock Name="Title" FontSize="24" Margin="12,14"/>
</CommandBar.Content>
<AppBarButton Icon="OpenFile" Label="openFile" Click="AppBarButton_Click" />
</CommandBar>

但是发现有一个问题就是在CommandBar的右边总是显示[···]的More 按钮,于是又看了一下文档,发现CommandBar有OverflowButtonVisibility属性,
修改为隐藏即可。

1
<CommandBar DefaultLabelPosition="Right" IsOpen="False" OverflowButtonVisibility="Collapsed" Grid.Row="0">

选择本地文件

仍然参考官方文档Open files and folders with a picker写出如下代码:

1
2
3
4
5
6
7
8
9
10
11
12
13
14
15
16
17
18
19
private void AppBarButton_Click(object sender, RoutedEventArgs e)
{
var picker = new Windows.Storage.Pickers.FileOpenPicker();
picker.ViewMode = Windows.Storage.Pickers.PickerViewMode.Thumbnail;
picker.SuggestedStartLocation = Windows.Storage.Pickers.PickerLocationId.PicturesLibrary;
picker.FileTypeFilter.Add(".mp3");
picker.FileTypeFilter.Add(".mp4");
Windows.Storage.StorageFile file = await picker.PickSingleFileAsync();
if (file != null)
{
// Application now has read/write access to the picked file
this.textBlock.Text = "Picked photo: " + file.Name;
}
else
{
this.textBlock.Text = "Operation cancelled.";
}
}

然而多处报错,在根据VS的提示修改之后,错误更加严重了,AppBarButton_Click方法返回值类型不匹配。于是又借助搜索引擎,找到一篇blog参考它写出如下代码:

1
2
3
4
5
6
7
8
9
10
11
12
13
14
15
16
17
18
19
20
21
22
23
private async void add_Click(object sender, RoutedEventArgs e)
{
var openPicker = new FileOpenPicker();
openPicker.SuggestedStartLocation = Windows.Storage.Pickers.PickerLocationId.VideosLibrary;
openPicker.FileTypeFilter.Add(".mp4");
openPicker.FileTypeFilter.Add(".mp3");
StorageFile file = await openPicker.PickSingleFileAsync();
if (file != null)
{
var mediaSource = MediaSource.CreateFromStorageFile(file);
Title.Text = file.Name;
myPlayer.Source = mediaSource;
mediaSimple.SetMediaPlayer(myPlayer);
if (file.FileType == ".mp3")
{
//Todo 播放音频时显示专辑封面旋转
//可通过 Ellipse 实现
}
}
}

乍看没什么区别,为什么第一次就报错呢?仔细对比发现,第一次的代码在根据VS提示自动修改后会变成:

1
private async System.Threading.Tasks.Task AppBarButton_ClickAsync(object sender, RoutedEventArgs e)

将返回值类型修改成了task,这也就是为什么报错是返回值类型不匹配。这里其实之前嗨翻了一个错误,就是没有写 mediaSimple.setMediaPlayer(myPlayer);这句,导致打开文件之后一直啥也没有。
通过 myPlayer.play(); 测试出已经正常打开文件了,这才找出是因为没有和XAML的控件绑定导致的。

界面

打开应用和播放音频时直接显示白色界面,看起来有些简陋。参考blog
给Grid添加Image来简单装饰,于是打开画图板绘制了一张切合标题的背景图。

1
2
3
<Grid.Background>
<ImageBrush ImageSource="Assets/pic.png" Opacity="0.9" />
</Grid.Background>

总结

出现问题时要认真看报错啊,FileOpenPicker那个错误报错已经很明显了。
官方文档才是最全面最可靠的。
最后希望写代码的时候能头脑清醒,少犯智障的错误,尤其是写完了却误删代码这种,可长点心吧。

KnowMyWeapons Part2

发表于 2018-03-26

在快速阅读给出的文档材料并有选择的详细阅读其中部分章节后,选择5个topics来实现Bilibili App的部分功能。

App-to-App

分享视频或动态

share
ShareScreenShot
可使用 Share Data来实现对视频或动态、图片的分享.
并且支持分享到B站内或者QQ、微博等其他6个App。站内分享还需使用 Receive Data在站内接收数据。

复制评论

copy
评论区长按某条评论可自动复制到剪贴板,该功能可用Copy and Paste实现。
同时还可实现评论输入文字时粘贴剪贴板的内容。

Audio, video, and camera

播放视频是B站App的主要功能,为了使用的方便B站也在此基础上添加了许多细节功能。

播放视频、音频

audio
video
B站最近的更新中细分了视频区与音频区,音频和视频的播放都可以使用Play audio and video with MediaPlayer
但是,我认为无法严格实现B站的播放功能或者说是不能播放B站的视频。B站缓存在本地的视频格式是.blv,本地播放器检测不出来,且B站会对其进行分段。

稍后播放

playlist
稍后播放即添加到播放列表,可以用Mediaitems,playlists,andtracks实现。

后台播放

backplay
B站同样支持视频和音频的后台播放,可使用Play media in the background实现。

截图

screencap
在视频播放界面可以使用截图保存喜欢的画面,这个就是用Sreen capture来完成。
文档中还考虑到了React to capture item resizing or device
即在截图过程中,应用调整了页面这个问题。对此 Screen Capture 的解决方案是调用 Recreate方法,并舍弃之前的所有帧。截图这个功能用起来可能只要一眨眼的功夫,然而背后实现却并不简单,需要完备的考虑各种情况。

Devices,sensors,and Power

这一章节中有许多有趣的sensor,类似于一个sensor科普文章。介绍了许多诸如陀螺仪、罗盘、重力感应器等许多手机上常见到的感应器。

重力旋转

gravity
横屏180度旋转播放界面都会自动旋转来适应,难以通过截图来体现该功能。这个功能是通过Sensor中的Accelerometer来做到的。
Sensor这一章都十分有趣,介绍了各种传感器的一些原理。比如在这个传感器中,对于旋转感应的是运动向量和重力向量之间的夹角。这也解释了为什么使用这个sensor时运动方向不能与重力方向共线。
回想生活中的使用场景,从站着看手机到坐下,屏幕不会旋转,而竖屏到横屏则会切换正是因为前者的运动方向是沿Z轴垂直于地面的。

自动调节亮度

这个功能同样难以通过截图体现。播放界面在关灯后会自动变暗正是靠Light sensor实现的感知环境亮度,并依此调节屏幕亮度。

Files, folders, and libraries

缓存、播放本地视频

download
用户可以在使用B站播放已经缓存在本地的视频,这就需要打开本地的文件了,可以通过Open files and folders with a picker来实现。
不过B站是将.blv文件直接显示在App内,而不是使用picker选择。猜测是因为格式原因,并不能使用B站播放其他视频。
缓存文件则可以通过Create,write,and read file来在本地创建文件。

Launching, resuming, and background tasks

Background tasks包括了之前提到过的后台播放功能,主要是关于后台任务等。

后台下载

download
B站支持在后台缓存视频,后台这个可以用Background tasks。
文章中详细介绍了后台任务从创建到debug,还有处理被取消的后台任务,监控后台任务进度等。

总结

感受到了其系统性和完善性。如果说功能是一颗树的枝干,那么开发人员还要尽可能考虑到枝桠上的每片叶子。着实不易。

Know My Weapons

发表于 2018-03-19

简述体验所有control后,结合以前使用Qt和JAVA设计界面的经历,对其中5个control的思考。

Acrylic

效果实现

亚克力玻璃效果被越来越多的应用到了Windows应用的设计中。这种半透明的设计使应用有了简洁大方的优雅。刚好昨天在调blog的正文背景用到了半透明(其实就是调整背景颜色的透明度),对比发现Acrylic的实现不是简单的调整Tint color 的透明度,而是加了模糊效果才做到的。

营造景深

Acrylic
比起简单的透视背景,我觉得Acrylic更有趣的应用在于和ScalarAnimation的结合来营造出内容向后缩退的感觉,如上动图。这样能为扁平化设计增添景深和动感,使交互灵动活泼。

问题

window
但是Acrylic中还有一个量即Fallback color,使窗口在非激活状态显示这个颜色,如上图XAML Control这个应用在非激活时左侧导航栏背景显示为白色。这个设计让人感觉比较鸡肋,不能体会其存在的必要性。反而会导致一些问题。比如Win自带的Calculator在最大化时会闪一下。

Calendar

calendar

设计缺点

年份月份的显示方式完全不能表明它其实可以被单击后修改年月,这是我随便点到才发现的功能。其次界面称得上简陋,没有我们惯用的将农历小字标注和节日节气标注。

显示bug

如上图显示,在选择年份时下边几个年份是不能选择的,所以做了灰色的阴影来表示,这个方法是没问题的,但是,这个控件只能使用滚轮向上逐行滚动,滚动速度是比较快的,就导致新的界面的下两行仍然有灰色阴影。猜测可能是因为追求速度,没有将每个格子重绘只是修改了显示的数字。在选择月份和日期时有同样的问题。建议将选择日期时的方式由逐行滚动变为换页,左翻一页,一页显示一个月的日期。

Password Box

密码框使用起来感觉还不错,可以在代码中设置Headler,PlaceHolderText,PasswordChar等,但有一个细节令人感觉有些不方便。如下图所示,在输入密码之后鼠标长按“眼睛”状图标即可查看输入的密码,松开后再次长按即可再次查看密码如左图所示。但是如果此时鼠标在其他任意地方单击了一次之后,这个眼睛的图标就消失了,再也不能查看已经输入的密码如下图所示。
Password
这样设计可能是为了安全考虑,但是有谁会长时间停留在输入密码的界面呢。我想大多数应用场景都是,用户手脚麻利的输入用户名和密码,然后一发自信提交,坐待登陆。当密码输入错误时才会去查看密码进行修改。偏偏此时已经不能查看,只能重新输入。
Password-inviseble

RichEdit Box

RichEditBox
这个富文本编辑器控件是麻雀虽小,五脏俱全。支持打开文件、保存文件,字体调整、文本搜索,且文本搜索对大小写不敏感。

设计费解

字体调整中支持粗体、斜体和,等等这个大写A下加一线竟然是修改字体颜色的???下划线呢???
其次,对字体选择加粗、斜体等效果后按钮毫无变化,没有被选中的显示。建议使用ToggleButton的效果直截了当的显示当前已经选中的效果如下图。
ToggleButto

Combo Box

ComboBox
为了对比Java中的ComboBox,动手在VS中实践了一下ComboBox。相比而言,这个控件的使用更简单易用。添加ComboBoxItem也只要描述清楚Item的content等就好,在JAVA中则还要考虑监听等。但是控件细节还需要完善。比如向下拉菜单中的每一项添加图片或icon图标,应用场景是绘图板中通过下拉菜单选择线型,我希望的是菜单中每一项直接是直线或虚线的图标,便于选择效果也更加直观。去年在用JAVA写画图板的大作业中实现了这个功能,走了一些弯路,因为Item直接加icon图标是不显示的,需要给每个选项添加渲染器,同时监听。而在这里,我查阅了微软官方文档但其中并没有提到添加图标图片之类,但在与ComboBox相似的菜单控件MenuFlyout则可以添加icons。

总结

Windows的控件的设计风格类似于 MateriaDesign,扁平化,多留白,线条简单,配色统一。然而MicrosoftStore中的应用总是不尽人意,有些甚至是简陋。还需要相关开发者的努力哇,其实这种风格还是很好看的。
在学习过程中,感觉使用C#做可视化编程其实和用Qt Creator 非常相似,都可以先通过拖拽控件设计界面,然后再补充代码完善相应的event。但是使用Qt时往往是为了给用Cpp写的课设加界面,经常会出现不兼容、字符串乱码的情况。这次直接学习C#应该会好很多。但是总而言之二者都比JAVA写界面要方便的多。

Hello World!

发表于 2018-03-19

test

Sart

万事开头难啊,去年暑假就申的博客一直到现在有作业催着才改好。果然deadline才是第一生产力。

感受

CSS真的很麻烦哇,可能因为没有系统了解过。为了达到自己想到的效果都是Google + 随便尝试,总是感觉容器莫名其妙的不按代码来。写的时候还要考虑各种窗体变化、兼容问题等。单是一个容器的居中效果竟然就有十多种写法,博大精深博大精深!

现在一些提供免费服务的网站的注册要求越来越严格了,不仅要验证手机,某牛竟然还要上传身份证照片,断然拒绝了。各种网站都在疯狂搜集个人信息,安全堪忧。

收获

动手实践

用到了老师上课讲过的margin,padding等。

1
2
3
4
5
body{
Width: fit-content;
margin-left: auto;
margin-right; auto;//实现居中
}

了解深浅

一个反应快速,简洁优美的界面是如此的来之不易,需要千万次调试来对最佳设计效果精益求精。以后再吐槽界面丑的时候会小声轻轻的。

白发三千丈,缘愁似个长。

李白秋浦歌

总结

本篇文章是对引用图片、音乐、高亮、标签的测试。

G1NTOKI

G1NTOKI

8 日志
2 标签
© 2018 G1NTOKI
由 Hexo 强力驱动
|
主题 — NexT.Muse v5.1.4